How to install Jenkins on Windows?
In this tutorial, you will have a walk-through to the installation and setup process of Jenkins continuous integration software on the Windows operating system. Before we begin the installation process of Jenkins, let’s know something about Jenkins:
Introduction to Jenkins:
Jenkins!! Jenkins is used everywhere for Continuous Integration(CI) server. Jenkins is an automation server for continuous delivery to build the application. By using this we can build, test and deploy the software. Jenkins is freeware software, we can use this software for any operating system.
e.g.Windows, Ubuntu etc.
To install this software on windows we need some Prerequisites-
- We need minimum 10 GB of drive space of the computer.
- The most important to install Jenkins, we need Java installed properly on the system.
- We can get the Java on this link – [ Compulsory ]
http://www.oracle.com/technetwork/java/javase/downloads/jdk8-downloads-2133151.html
There are two ways to download Jenkins software-
- We can download it as “.msi” file or “.war ” file.
A] .msi file – [ We need to select a file as per operating system. Here we are going to select for Windows OS ]
B] .war –
Let’s get started with the installation process of Jenkins on Windows operating system.
Steps To Install :
1] JDK (Java SE Development Kit) – [ Compulsory ]
- Before installing Jenkins on the system first we need to install Java in the system.
- Go to the URL of Java software and download it as per the operating system i.e. Windows.

Link: http://www.oracle.com/technetwork/java/javase/downloads/jdk8-downloads-2133151.html
- After successfully download the software we need to install in the system.
- Once the installation is done completely we need to set an environmental variable in the system.
- To set the environmental variable we have to follow some steps-
- Go to the Control Panel —>All Control Panel Items –>System.
- Click on Advanced System Settings

- In the System properties, click on the PATH environment variable and select it. Click Edit. If the PATH environment variable does not exist, click New.
- Give the complete path of Java by creating or editing Java_Home.

2] Let’s begin with Jenkins Installation:
a) Download and install “Jenkins.msi” file.
- To download Jenkins go to Jenkins official link (Download as per the Operating System – Windows)
Link: https://jenkins.io/download/
- After successful download of .zip file, extract that file and you will get Jenkins.msi file.
- Click on Jenkins.msi file.
- Select the path of the computer for the destination folder.


- Here Jenkins asks the Initial Admin Password.

- To get the Initial Admin Password to go to computer path i.e. c:\Program Files (x86)\Jenkins\secrets

- Open InitialAdminPassword file

- Copy the Initial Admin Password

- Paste it into “Administrator Password” section.

- After filling the password, just proceed with the continue button. Now, install the plug-ins which are useful for Jenkins tool.

- Jenkins will start to install Default plugins and required plugins.
Here are the details of required Jenkins plugins:
1. Git Plugin: Git plug-in is used to build the application. It basically works as a build SCM(software Configuration management), including different repositories. It also includes Master as well as Staging type of branches.
2. Gradle Plugin: Gradle plug-in mostly used to build the script as the main step for android applications. It is mostly used to build and create the android applications.

3. BitBucket Approve Plugin: This is useful for approve commits on Bitbucket after successful builds.
4. Email Extension Plugin: Email extension plugin in used to get the notification about the build. By using this plugin, we can set the content for the email along with that, we can specify email subject and email body. By adding recipient list we can send the notification to the users, select the conditions that should cause an email notification to be sent and we can also send the latest apk if build succeeds.

5. msbuild-Gradle Plugin: Gradle plug-in mostly used to build the script as the main step for .Net Applications. It is mostly used to build and create .Net applications. It is mostly to use MSBuild to build .NET projects.
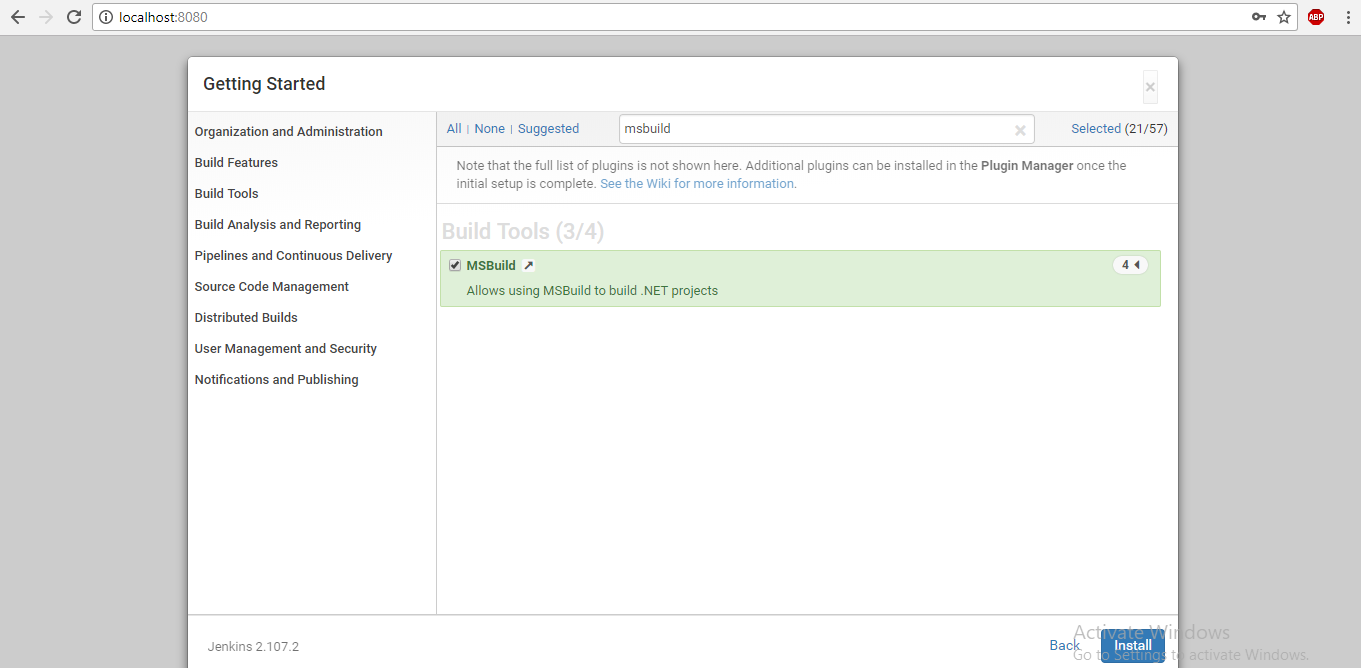
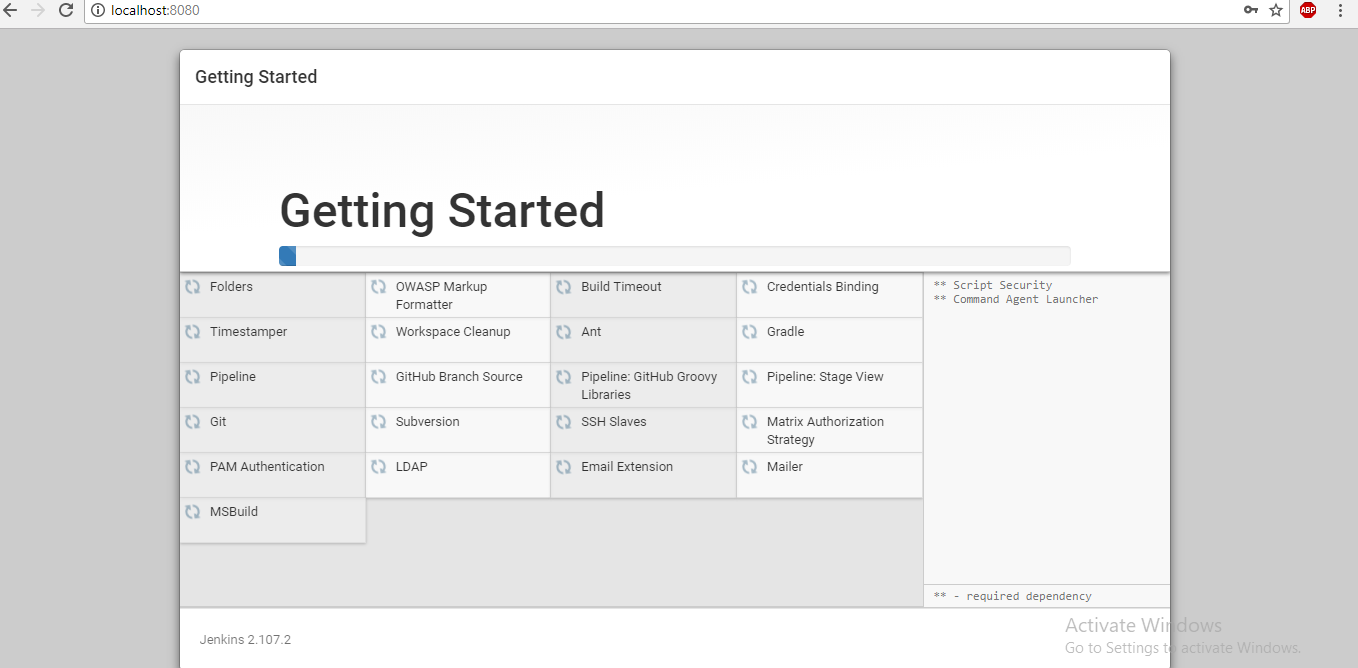
- Once after completing Installation of plug-ins, then it will ask to create admin user as shown in given image:
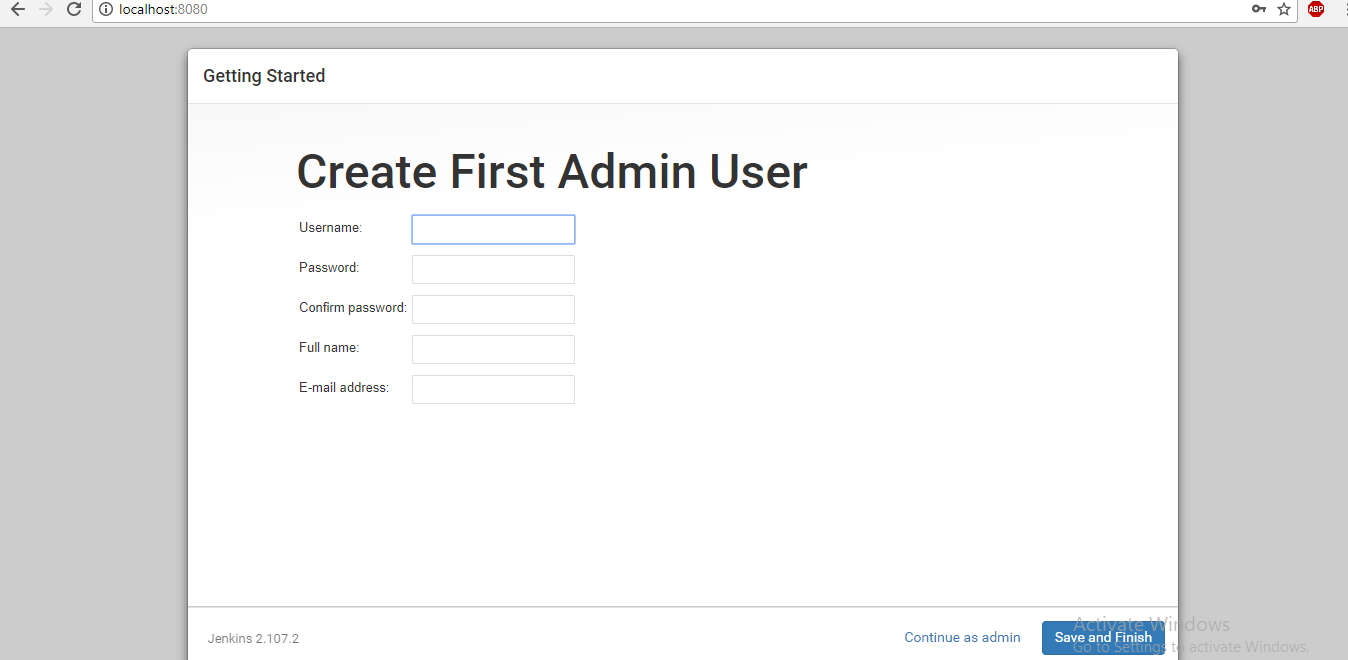
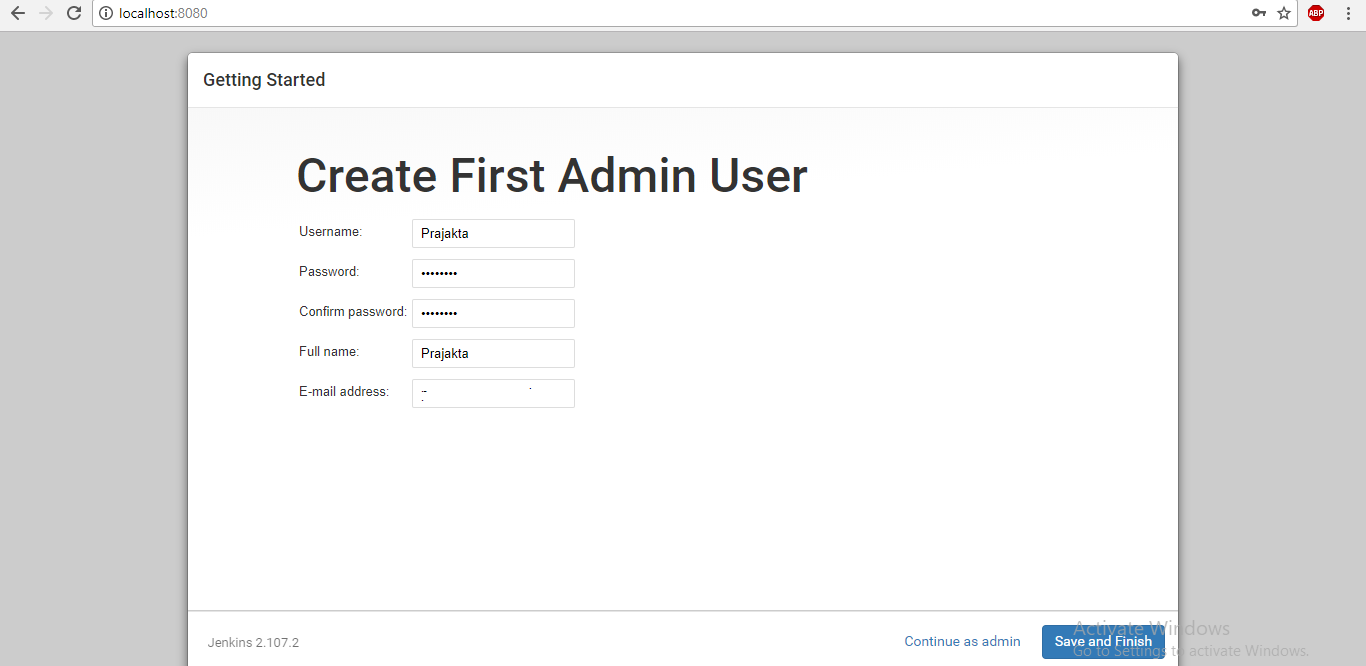
- The user has to type Username, Password, Confirm password, Full Name, and E-Mail address. After that click on Save and Continue button.
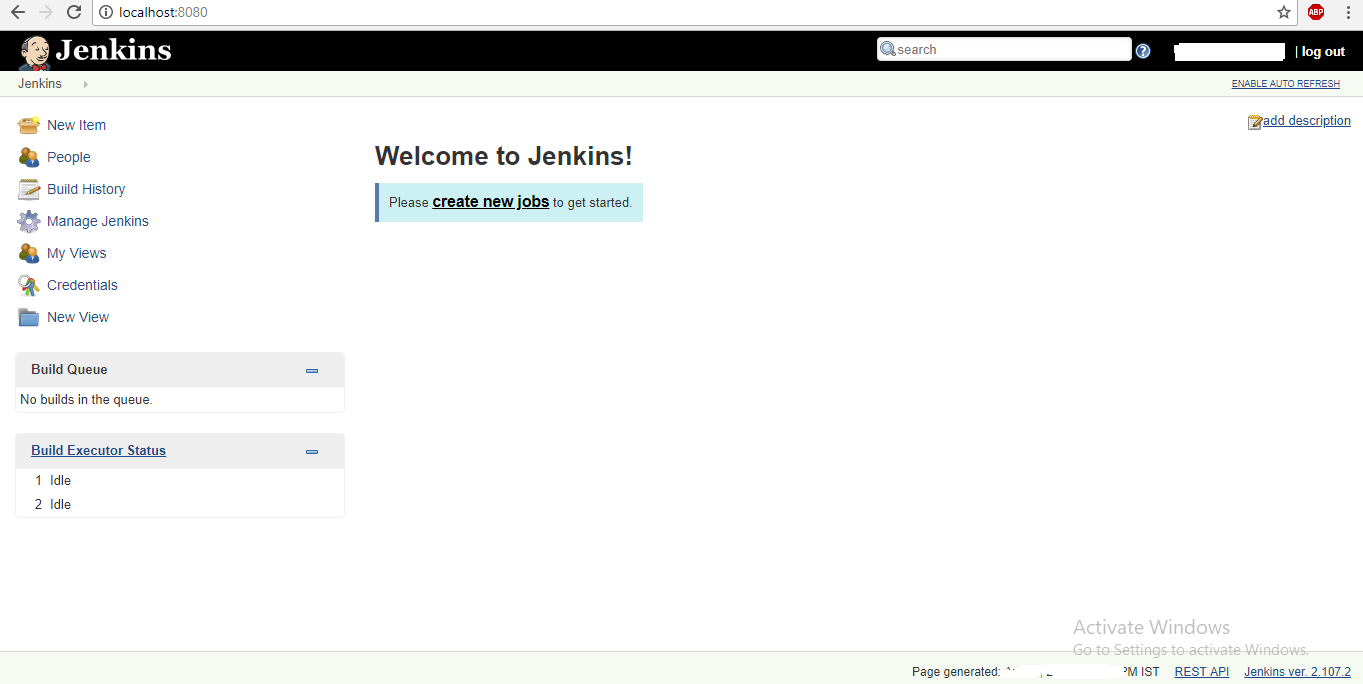
- After successful installation of Jenkins, we will able to see Jenkins Local Dashboard. It always runs on Localhost.
http://localhost:8080/
- B) Download and install “Jenkins.war” file.
- To download the “.war” file for Jenkins, go to the below URL
- To get the .war file download the latest .war .
- After downloading the file, open a command prompt of the computer, go to the folder where it is present.
- Then type command to run and install the Jenkins on the System.
- Command: java -jar Jenkins .war
- Once this command runs, go to the browser and type localhost:8080.
- It will ask for the Initial Admin Password.
- Now, follow the rest steps as explained in the above post i.e. Section A for “Jenkin.msi” file.
Basic Configuration of Jenkins:
Before starting to build for an Android or .net application we have to set some configuration on Jenkins server. For that, we need to do some settings in the Manage Jenkins section.
- Manage Jenkins-Configure System:
- Global Properties:
- Here we have to check the “Environment Variables” and after that set the environmental path as android sdk.
- Name: ANDROID_HOME/SDK_HOME (Anything whichever you have already set on the computer)
- Value: C:\Users\ComputerName\AppData\Local\Android\sdk

B. Jenkins Location
- Here we can create the URL for Jenkins server by using server name and port id.
- Jenkins URL– http://192.168.0.118:8080/ (Here we can set the IP address of our computer with Jenkins port id: 8080)
- System Admin e-mail address: [email protected]

C. Extended E-mail Notification
- In this section, we can set the settings for Email notifications(Refer E-MAIL NOTIFICATION Plugin).

D. E-mail Notification
- we can set the settings for Email notifications
- SMTP server: smtp.gmail.com
Do check if it is unchecked -as Use SMTP Authentication - User Name: [email protected]
- Password: type password of email id
Do check if it is unchecked -as Use SSL - SMTP Port: Give port as 465 which is mostly used for SMTP of email notification.
Char set: UTF-8

E. Bit Bucket Approve:
- User – Email id of Bit bucket
- Password: type password of email-id

2. Global Tool Configuration
A. JDK
- Here we have to give environmental path under JDk section.
Name : JDK 8 (give name of JDK)
JAVA_HOME: C:\Program Files\Java\jdk1.8.0_112 (Give environmental path)

B. Git
- Here we have to give Git’s Set environmental path as:
Name : Default (give name of Git)
Path to Git executable: C:\Program Files\Git\cmd\git.exe (Give the environmental path)

C. Gradle
- Here we have to give Gradle’s Set environmental path.
Name : Gradle 4.2
GRADLE_HOME: C:\Users\ComputerName\gradle-4.2.1

D. MsBuild
- Here we have to give MsBuild’s Set environmental path.
Name: MSBuild .NET v4.0
Path to MSBuild: C:\Windows\Microsoft.NET\Framework\v4.0.30319

In this above Article, I just explained how to install Jenkins on Windows Operating System. Hope you all liked it. Thank You..!!!

Awesome Article look similar article
Jenkins CLI Example